Canva
Use the Page Navigation View
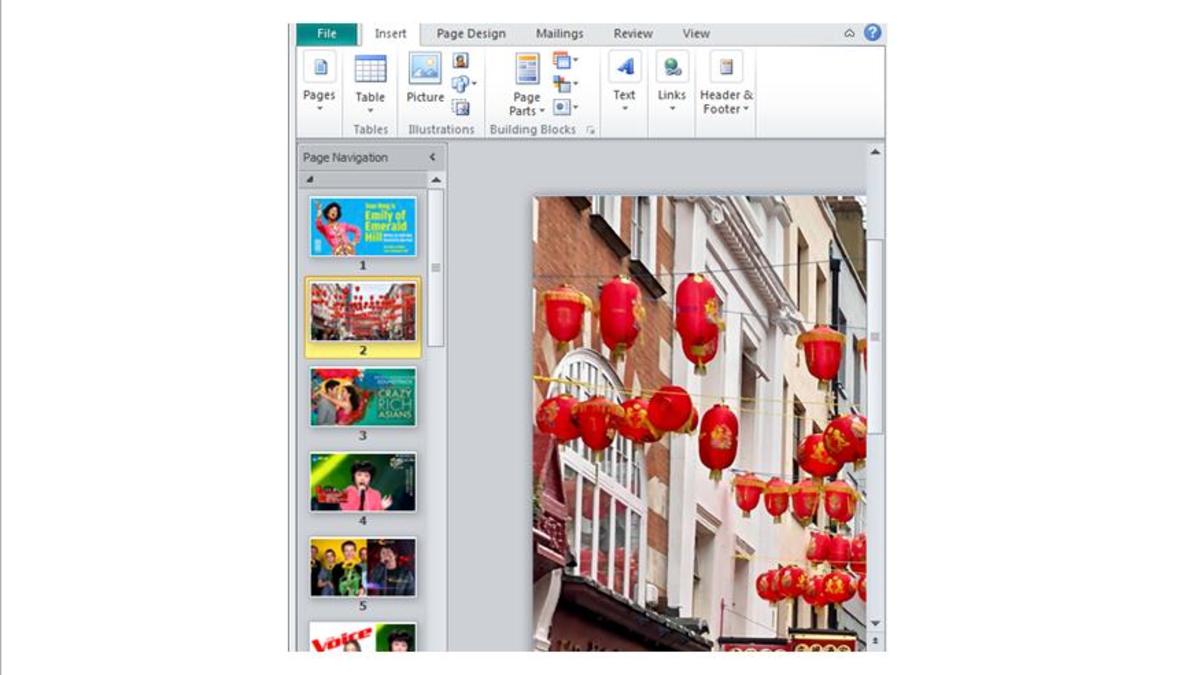
After opening a new, blank document in MS Publisher, I can’t stress how important using the ‘Page Navigation’ view is, because it makes the entire graphic design process a piece of cake. So go to View, then tick Page Navigation. A ‘Page Navigation’ column will appear on the left-hand side, containing the single page you’re working on. Use this single page to design a graphic, and place one graphic onto each page; the reason why will become clear later on. Photo taken by Beanie Lei
How to Design Your First Graphic
Determine Your Units
If you’re going to print your graphics, stick with the page sizes and units of measurement you know. In the UK, we use A4 paper and the metric system (centimetres or millimetres), but in the US, foolscap and the Imperial system (inches, anyone?) are the norm. To pick your preferred unit, go to File, Options, Advanced, Show Measurement in Units of… and pick ‘cm’ or ‘inches’ from the options provided.
Page Design / Page Setup
Go to Page Design, then Page Setup. Specify your document size to help you fix your graphic size. If your graphics are going online, and if they’re linked to something physical like a book, you could either use an online converter to convert your unit of length to pixels, or you could go to File, Options, Advanced, Show Measurement in Units of… and pick ‘pixels’. The good news is that social media graphics like Twitter headers, blog posts, Facebook page covers, and Instagram squares have fixed sizes. The bad news? Well, these sizes change every now and then, and it’s best to use Befunky or Canva to keep abreast.
How to Work With Layers
Now comes my favourite part: this is the chance for you to shine, to let your imagination run wild and free! Use the Insert tab and insert one or more design elements (text boxes, pictures, pieces of clip art, shapes, and/or picture placeholders of your choice) into your document. Since MS Publisher relies on layers, this means you can place one design element above or below another. If your design element is a text box, click on the text box, then Drawing Tools, then on Bring Forward or Send Back to fix whether it is above or below another element. If your design element isn’t a text box, you’ll see Picture Tools in place of Drawing Tools. Whatever your design element, use Align under Bring Forward and Send Back to quickly put your design element in its place. You can also click on your design element, then toggle the small green circle that appears to adjust its orientation. Or you could click and hold onto your mouse until a small black cross with four arrowheads appears under your cursor, and once you see this, if you keep holding onto the click, you’ll be able to move your element anywhere you want. A note on pictures: you can’t work with SVG files in MS Publisher. You can only work on JPEG, PNG, and TIFF files.
How to Change the Colour of a Design Element
Your other new friend in MS Publisher is the Format tab, which contains options to change the colour(s) and opacity of a design element. For more actions, you’ll need a photo or vector editor like Adobe Illustrator, Lightroom, or Photoshop.
How to Work With Text
If text plays a big part of your graphic, then it’s best to either use what MS Publisher provides—or install a font by downloading a zip file from Dafont or Font Squirrel into a new file on your desktop, then transferring the font to your computer by going to Start, Computer, Local Disk (C:), Windows, Fonts. You’ll have to complete this installation before opening up MS Publisher.
How to Crop Pictures
My very own bestie and secret weapon in MS Publisher is the crop tool, found under Picture Tools. With the crop tool, I can expand or shrink a picture, and shape the area I want to fit into my graphic. I couldn’t live without it!
How to Design Your Second (and Subsequent) Graphics
You’ll now need to achieve a consistent look across your designs, or to keep your graphics (for example, for sewing patterns, booklets, or social media posts) the same size. To do this, finish designing your first graphic on your one and only page, then left-click the small page under the ‘Page Navigation’ column to choose either Insert Page or Insert Duplicate Page. To keep the designs for my current front covers for my ebooks constant, I went for Insert Duplicate Page. All I did next was change the main picture, book title, and book subtitle for my other books. Similarly, when I was designing sewing patterns and booklets, I needed graphics of a certain size and look. With Insert Page, I got my second and subsequent graphics in place quickly. You’re now ready to save your graphics! To do this, click on each graphic in the ‘Page Navigation’ column, then click on File, then Save As. Enter a name for your graphic, and save this as a JPEG, TIFF, or PNG file (you cannot save this as a SVG file). You’ll need to repeat this process for your third and other subsequent graphics. To save the MS Publisher file containing all your graphics, go to ‘File’, then ‘Save’. We’ve now reached the end of our quick tour around MS Publisher. I hope that you’ll enjoy using it for your next big project, whether it’s crafting or social media! Have fun! © 2020 Beanie Lei
Comments
Beanie Lei (author) on September 21, 2020: Thank you for your points on ‘house style’ and ‘white space’; I’ve heard about the former but am completely in the dark about the latter, so I’ve learned something new today! I tried to use as little jargon as possible, and to write as little as possible about concepts like house styles because I thought this would encourage more people to have a go at using Publisher - once someone takes that plunge and actually tries Publisher out, they can then delve deeper into whatever they’re interested in, and refer to more specialist articles and authors for advice. I’ll certainly be keeping an eye out for your articles if you do cover these topics! Beanie Lei (author) on September 21, 2020: I’m glad you’re going to give MS Publisher a go. It isn’t intuitive but once you understand how it works, it is much easier to use than Word for document layouts and graphic design. Alan R Lancaster from Forest Gate, London E7, U K (ex-pat Yorkshire) on August 13, 2020: Beanie, you’ve obviously had fun with this. The ‘house style’ graphics are a way to establish your mark as a designer. Or you can suggest a ‘house style’ to clients with style examples, using a letter-head as a starting point. One other ‘selling point’ is ‘white space’. “What’s that?” you ask (go on, ask). ‘White space’ is where you have a large blank area and plonk an image or message - or both - somewhere in the middle to draw the eye. You have four pages in succession. In the first the image/message is slap bang in the centre, in the second it’s offside, in the third you put your message across and in the fourth you fill the space available with image, message and… whatever your client wants to sell the product. Enjoy yourself, you’ll have the lads queuing up to sell their wares. Next stop tea at the Ritz every Saturday night. Precious from Nigeria on August 13, 2020: I would definitely try using Microsoft publisher one of these days. Thanks for sharing this comprehensive article on how to use Microsoft publisher.