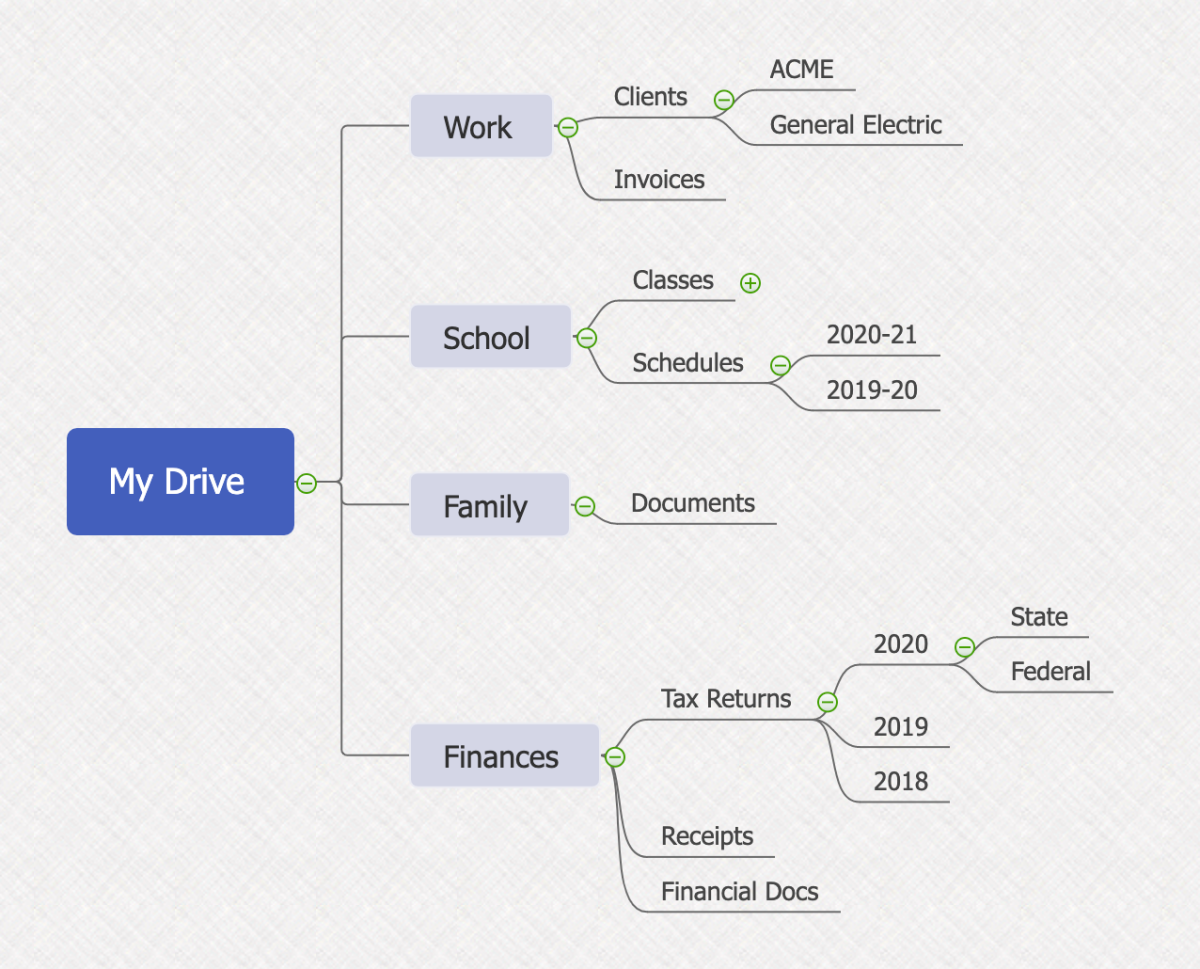
Step 1: Decide Upon a File Structure
Before you dive head first into creating folders and moving files around, you need to think about what your ideal file structure might look like. In other words, what will it look like when you are finished? Many people find value in sketching this out on a piece of paper, or using a mind-mapping tool like MindMaster.io, to create a flow chart of the folders that you need and how they will be organized. The finished product will include top-level, or root, folders as well as multiple layers of sub-folders. Folders are important because they are the organizational unit that you will use to sort your files, but you don’t want to create more than you need, especially at the top-level. The more folders you have at the top-level, the more cumbersome it will be in the long run, so think about the big picture. What are the least number of folders you could use to categorize your digital life? As part of your mind-mapping process, consider adding a folder called, My Archive. This is a great place to move files that are no longer relevant, but you don’t want to delete them in case you need to refer to them at a later date. This folder shouldn’t be a dumping ground for everything that doesn’t fit into your new file structure. Give it some order by creating sub-folders by date or by topic, else it too will quickly get out of hand.
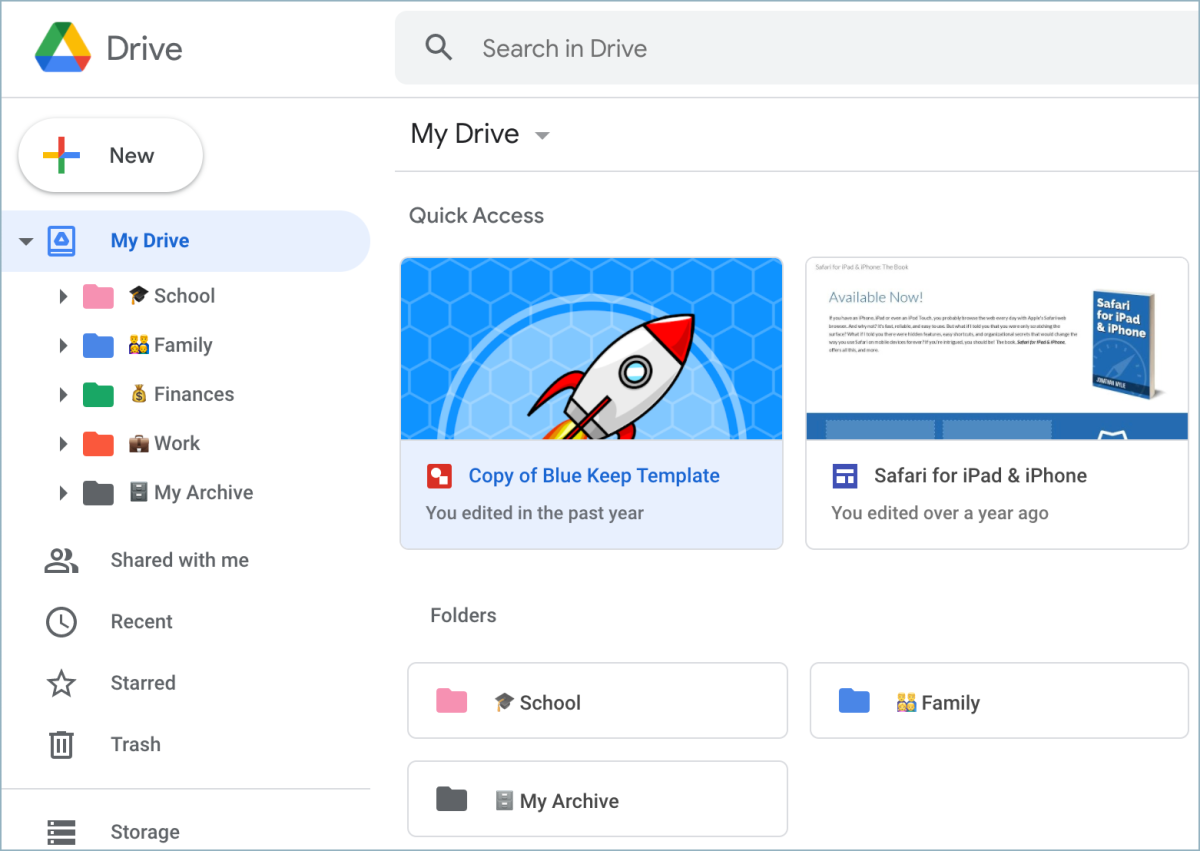
Step 2: Create Folders in Google Drive
Now that you have your ideal file structure mapped out, it’s time to create the folders that you need in Google Drive. It is important to recognize at this point that you may already have folders in your Google Drive, and that is fine. Leave them where they are for now and go ahead and create the folders that you planned out in step one. Start with the top-level folders, and then go deeper and create all the sub-folders. Jonathan Wylie To make your new folders easier to find you can put a period or a zero in front of the folder name. This will automatically surface them to the top of your file structure in the sidebar because Google sorts those folders by alphabetical order. You can also right-click on any folder and select a color for it. This is a great way to visually tag the folders you create and help you find the ones that you are looking for. Some people even add emoji to the folder name for some additional personality. You can do that quickly from a mobile device, or copy and paste icons from emojipedia.org. When you create your folders, try to think of a clear naming convention that accurately describes the content of the folder and can be used consistently across your Google Drive. You need to know exactly where your files are located so don’t make them ambiguous or repeat folder names across your file system because it will quickly get confusing and cost you time as you dig through multiple folders looking for the file you need.
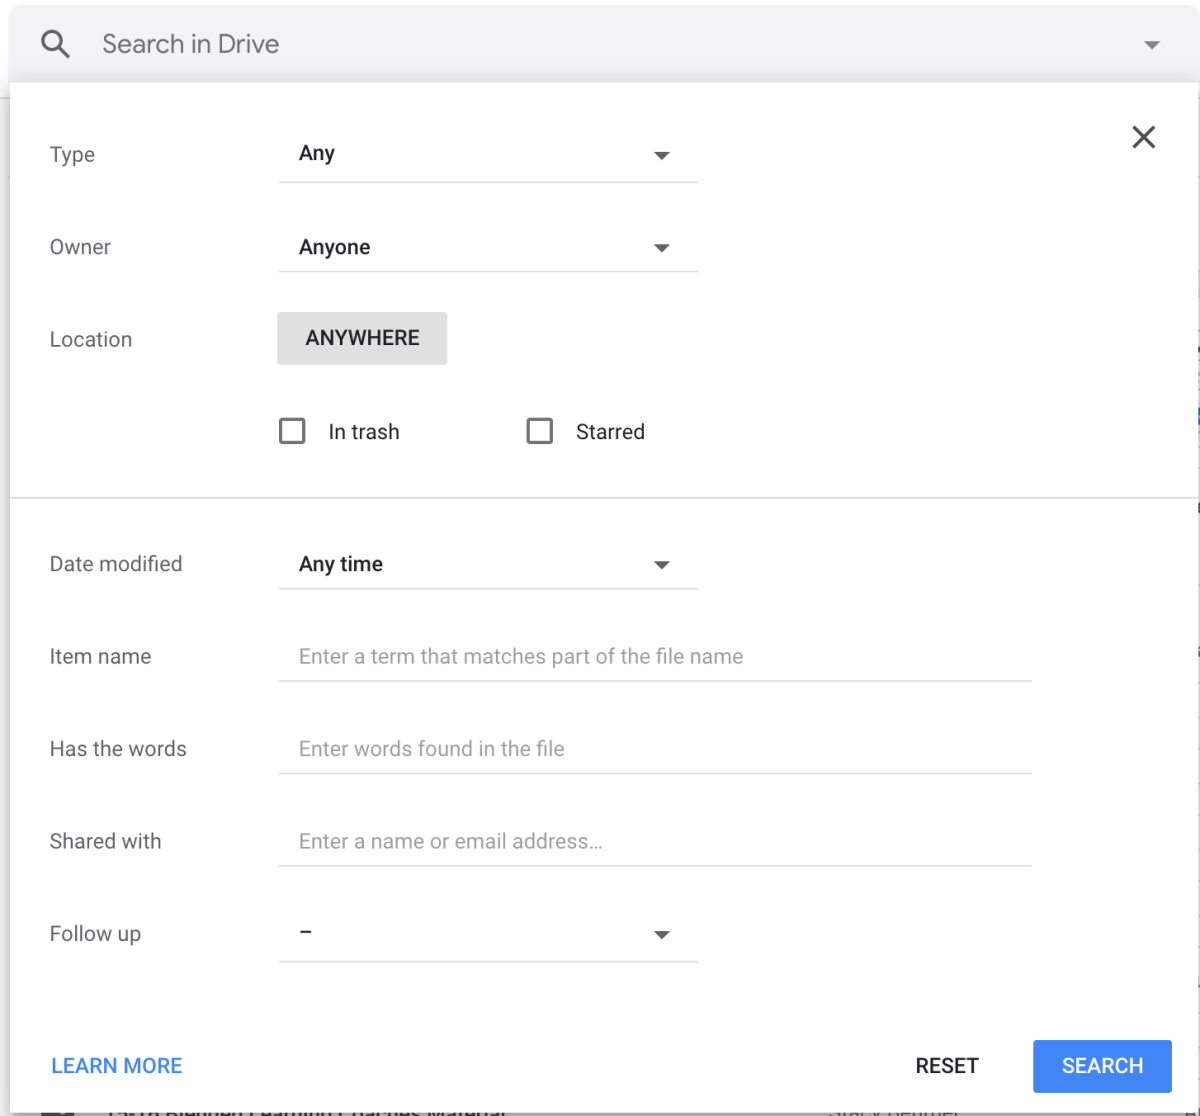
Step 3: Digital Dusting
Consider this step optional, but you may want to take a few minutes and do some digital dusting. The goal here is to reduce the number of files so that you only have what you need. If you delete old files now, you will have less to work with when you start moving things into your newly organized file structure, so it should save you time. Jonathan Wylie The truth is, everyone has files in their Google Drive that no longer serve any meaningful purpose. For example, I often create Google Docs and slide decks to demo features when I am training people on how to use Google products. Eventually, these ghost files just clog up my Drive, but if I use the search bar in Google Drive to search for “demo” or “untitled” as the file name, I can quickly find the files that need a one-way ticket to the trash. A great way to take this a step further is to use the advanced search options that are built-in to Google Drive. Simply click the arrow to the right of the search bar to find a variety of search criteria that you can use to weed out the dross from your Drive. For instance, you could set a filter to find all the PDFs in your Google Drive. You can also filter by the owner of the document, or look to see which files you have accessed recently.
Step 4: Moving Files & Folders in Drive
This is where the real work begins. It’s time to move all your files into the folders where they belong. First, you need to select the files that you want to move. You can select a single file or folder by clicking on it. You can select multiple files by clicking and dragging a selection, or by clicking on one and then holding down the Ctrl key, (Cmd key for Mac), and then clicking on the other files that you want to add to this group. Next, move the files to their new homes with one of the methods below: Jonathan Wylie If you create a new Google file, or open an existing file, look for the folder icon to the right of the document’s title. Click this icon to open the file picker and choose its new home. You can also click File > Move, to achieve the same thing. If you want to put the same file in more than one folder, you can use Drive Shortcuts. Like a desktop shortcut, a Drive Shortcut points back to the original location of the file. Here’s how to set that up: You can add as many Drive Shortcuts as you need and you can access the original file via the shortcut location, or the original location. Another way to organize your Google Drive is to use the desktop app. Not everyone knows the desktop version exists, but it is available for free for Mac or PC. Google has two versions of Google Drive for the desktop. Drive File Stream is recommended for people with a Google account that was issued by your business or school, while Backup and Sync is recommended for everyone else. You can find a link to download the desktop apps by clicking the gear icon in the top right-hand corner of Google Drive. The reason some people prefer to organize their files with the Google Drive desktop app is because it puts you in a file management environment that you are likely already familiar with. Once installed, it surfaces all your Google Drive files in a Finder window for Mac users, or in a File Explorer window for PC users. From here, you can create new folders and drag and drop things in the same way that you would with any other files that are stored on your computer.
What About Shared With Me?
Many people feel the need to organize their Shared With Me files because they can’t stand the clutter and chaos that they see every time they come here. However, that option does not exist. These files cannot be organized like My Drive, and the files will stay here until you manually remove them. Right now, you can only organize Google Drive files that you own. If this is frustrating for you, try thinking about Shared With Me as a filter. It’s simply a way to show the files that have been shared with you. Nothing more, nothing less. If someone shares a file with you that you would like to include in your My Drive file structure, you can right-click on it and use Drive Shortcuts to add it to a folder of your choice. It doesn’t move it out of Shared With Me, but it does give you an option for including it among your own files if that is important to you. If you want to remove files from your Shared With Me, simply right-click on the file and select, Remove. This does not delete the file, but it will remove it from your Shared With Me list. The original owner, and any other collaborators on this file, will still have access to this file.
Top Tips for Google Drive!
Star Files for Quick Access in Google Drive
When you star a file, you are essentially bookmarking it so that you can find it quickly. Starred files can be accessed by clicking the Starred option in the sidebar of your Google Drive. These files still live in the folders that they are assigned, but they are filtered and surfaced for more visibility in the Starred section of your Google Drive. You can right-click on any file or folder to add it to Starred, or select a file and press S on your keyboard to give it a star. Stars are best reserved for the files that you use again and again, but using Starred comes with some responsibility because you can’t organize it. This area can quickly get overrun with files that are not as useful to you as they once were, so you need to revisit your Starred files every few weeks to make sure that the files that are there are still relevant to you. You can remove a star the same way you added a star.
Success! You Organized Google Drive!
Depending on how many files you have, organizing Google Drive could take some time. However, with a systematic approach like this, you can take control. You can regain some order and plan ahead for the future. It takes discipline to maintain a system like this, but if you ever stray off the path of organization, you can always come back to this guide the next time your Google Drive needs a spring cleaning. This content is accurate and true to the best of the author’s knowledge and is not meant to substitute for formal and individualized advice from a qualified professional. © 2020 Jonathan Wylie